
|
|
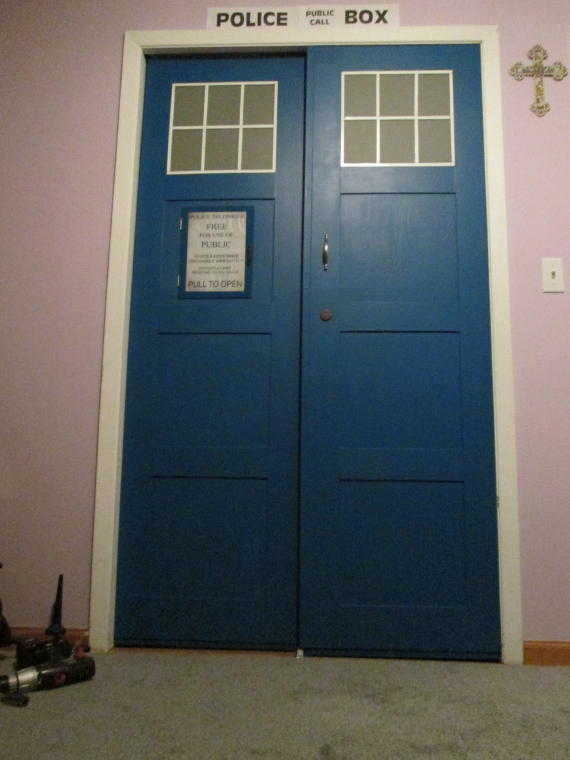
Doctor Who TARDIS |
| Sliding Closet Doors |
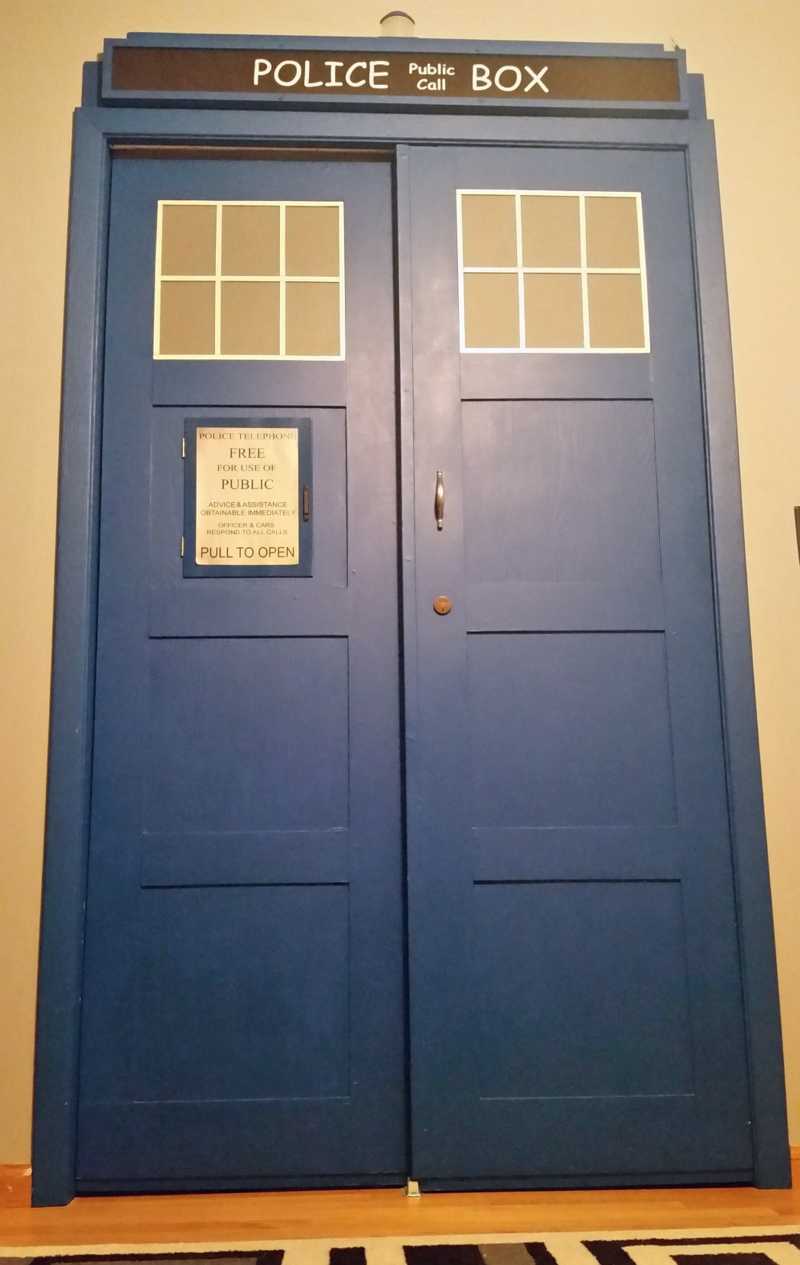
Completed TARDIS closet door project
A few extra details were recently added. The light on top and the crown trim are new.
Here are some details of my TARDIS closet door DIY project. These are not complete plans. Here is some useful info on how to build a pair for yourself.
We started out with very basic hollow doors that have a fake woodgrain texture embossed in Masonite or hardboard panels. The left door had a hole punched through it that had been repaired sometime ago. These doors have several coats of paint and the woodgrain texture which will give them a nice weathered look. The doors each measured 80 x 24 inches. The opening was 80 by 47 inches, with the right side outer door having a one inch overlap.
.JPG)
2/4/2013
|
Approximate dimensions. Measure everything before getting the wood cut. |
|
|
|
||||||||||||||||||
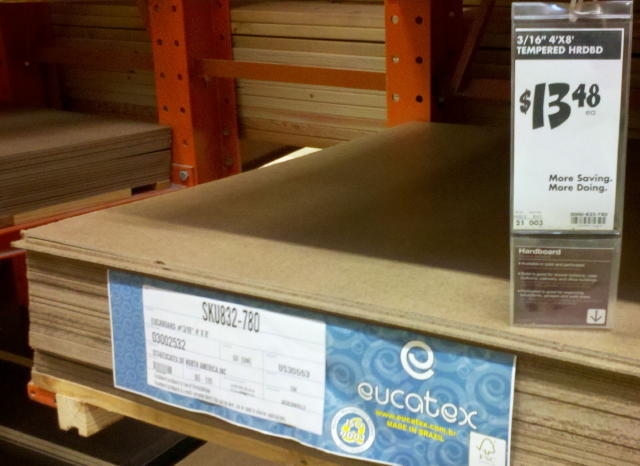
At Home Depot, I purchased a 4 by 8 sheet of 3/16 inch hardboard (also known as Masonite). They cut the wood for free into strips in the following sizes as indicated above.
The little door and window grid were cut from a 2 by 4 foot or a 4 by 4 foot sheet of 1/8 hardboard
| 1/8 inch hardboard | ||
| figure | quantity | width |
| windows | 3 | 48 x 1/2 in. |
| door | 1 | 10 x 13 in. |
They may or may not cut the thin 1/2 and 1 inch strips. Show them your pictures, if they know Doctor Who you have a better chance. ( At my Home Depot, a young guy cut the 1 inch strip.) When I came back for the 1/8 inch board, an older man told me they can't cut less than 2 inch pieces.
.JPG)
2/04/2013
It's really cold outside, so I've moved the project to my basement. I decided to use the back side of the doors because they aren't as beat up and the handle holes would be too hard to hide. All cuts were made with a miter saw. First , I put a 5 inch strip one inch up from the bottom of the doors. The one inch gap allows the standard door hardware to be used. Wood was attached with Elmer's carpenter glue. Clamps and full paint gallon cans were used as weights to hold the wood till dry. After all of the wood was glued and dry, I primed all unpainted wood. These are heavy doors! At this point the doors weigh about 32 pounds each.
|
|
2/08/2013
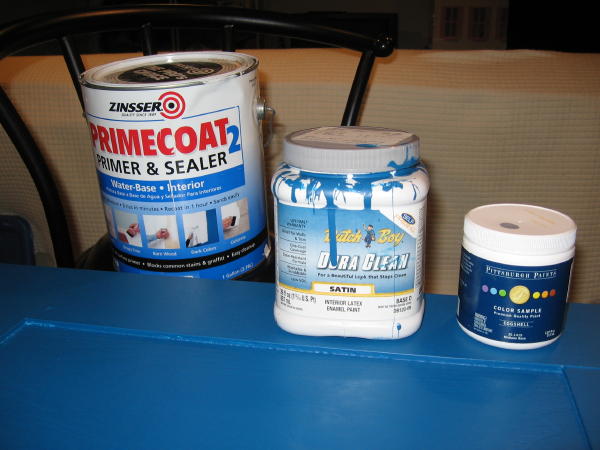
Next we painted the doors with 2 coats of Dutch Boy DURA CLEAN satin interior latex. The color we chose is called BOREALIS BLUE (DT162) from Menard's. We used less than one quart.
|
|
|
2/8/2013
.JPG)
2/10/2013
We painted the window with Pittsburgh Paints DOVER GRAY(57D-4) in a eggshell finish. We bought the 7 ounce sample size.
|
2/11/2013
|
Here's a Doctor Who toy that you can't buy at Thinkgeek! |
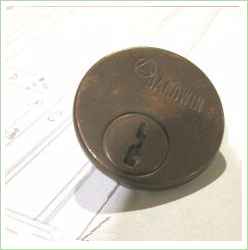
I got this dummy lock cylinder from my uncle years ago...don't know where you could find one today. It saved a lot of work.
.JPG)
2/12/2013

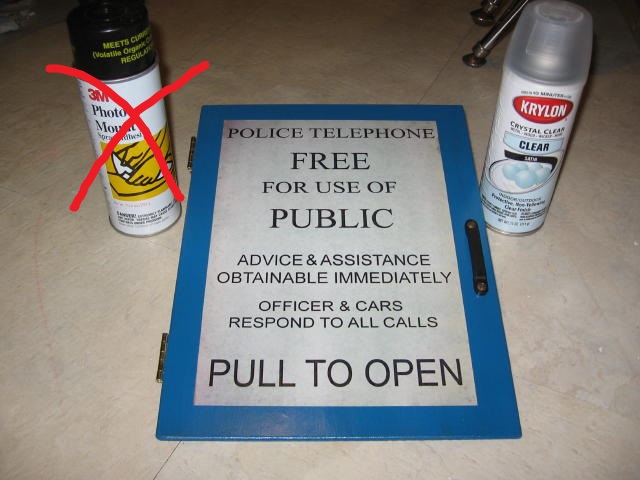
link to high res TARDIS door sign
I printed this on legal size paper with a color laser. It looks great!
.JPG)
2/15/2013
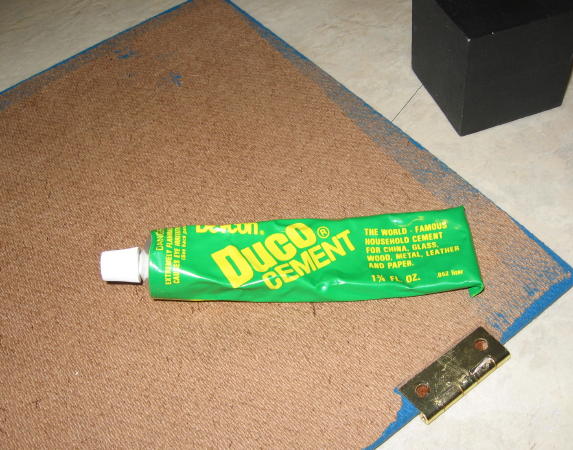
I made dummy hinges for the door by cutting the 2 center loops off one side with a hacksaw, reassembling and a few drops of superglue.
2/16/2013
Using a sharp knive, I carefully cut a thin layer out of the back of the door to recess the dummy hinge. Practice this on a piece of scrap. Glue in the hinge and allow to dry.
2/16/2013
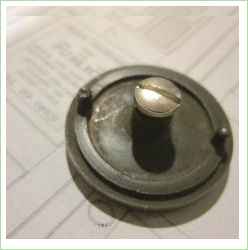
Don't use photo mount to attach the sign. I tried this and it reacted with the clear coat and fell off. Instead try a thin layer of Elmer's glue applied with a sponge. Allow it to dry completely. Again, you may want to experiment to a piece of scrap. For the little door handle, I had this flat strap bracket in my junk box. Sorry again, I don't know where you can get one of these. Whatever you use, it must be thin enough to fit between the doors. When re-hanging the doors, I layered some pieces of peel-n-stick vinyl tile to the inside top of the outer door (between the roller bracket and the door) to increase the gap between to doors.
02/17/2013
Maybe someday I will get around to making the backlit sign and light on top. No time now...

5/30/2016
Well, we finally made the back-lit sign. Yes, the font is Comic Sans. Thanks to our friends at Workshop 88 makerspace for helping with the laser cutting.
Good luck with your projects. Come back soon and see what else we are building.

Doctor Who, TARDIS © & ® 1963, 2006, BBC Worldwide. This page and all pages of snarpco.com Copyright (c)2019 by Chris Adams.
.jpg)
.JPG)
.jpg)
.JPG)
